Feeling Crafty? Check out the great project ideas put together just for you! Complete with easy to follow instructions, these fun filled crafts will keep you or your kids busy on a rainy afternoon. Print out the project sheets before you leave, and be sure to bring along the supplies listed with each one. There’s something here for everyone!
Pine Cone Bird Feeders
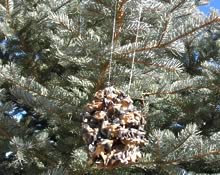
A pine cone bird feeder is easy to make and watching birds feed on it can be very enjoyable.
- Pinecone
- Peanut butter
- Birdseed
- Spatula
- High-sided pan or scoop
- String or ribbon for hanging
Instructions:
- Spread peanut butter on the pinecone with a spatula.
- Pour some birdseed into a pan with high sides or scoop out birdseed.
- Roll the pinecone into the birdseed or pour the birdseed onto the pine cone until it is completely covered.
- Tie a string around the top of the pinecone and hang it on a tree.
- Watch for the birds to come and eat their treat.
Download Pine Cone Bird Feeder Instruction Sheet
KOA Campground Picture Frames
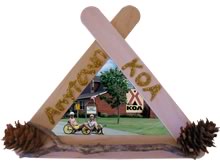
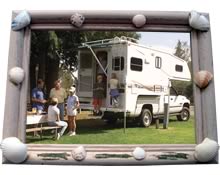 These are fun, easy craft projects for creating a camping memory keepsake.
You will need:
- Large popsicle sticks, or any pre-made picture frame
- Shells, sand, rocks, pine cones (something from your campground)
- Craft or wood glue
- Glitter glue or small foam letters (for popsicle frame)
- Magnets (3 for each popsicle frame)
Decorating a pre-made frame:
- Put the items you collected from the campground on the frame in whatever design you desire.
- Glue on the objects and let them dry.
- Then add your picture.
- Glue 3 popsicle sticks into a KOA tent shape.
- Put a magnet on the back of the frame at each point.
- Turn the frame over to the front side and put things on where you think you would like them (leave room for the name of the campground) and then glue them on.
- With glitter glue or small foam letters, write the name of the campground on the sides and let dry.
- Size and tape your picture to the back of the frame.
- Put it on the fridge.
Download KOA Picture Frame Instruction Sheet
KOA “Bug-in-a-Box”
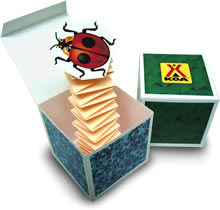
Make your own KOA “Bug-in-a-Box”! Choose from the four box patterns below, and from a variety of bugs (included with each box pattern). Assemble the box inside out to create your own unique Bug-in-a-Box designs!
Download Bug-in-a-Box Instruction Sheet
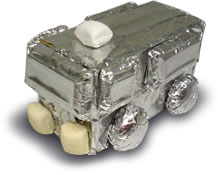
KOA Candy RV
- Packages of gum (2 large or 6 small)
- 5 Junior Mints®, Lifesavers®, Smarties®, or M&M® candies (wheels)
- 4 chocolate bar rectangles or mint bars (windows)
- 3 dessert mints or Chicklets® (lights and air conditioner)
- Hot glue gun
- Aluminum foil
Instructions:
- Wrap all the gum together in aluminum foil to create the body of the RV.
- Wrap all the individual candies in aluminum foil, except the 3 dessert mints or Chicklets®.
- Glue the 3 unwrapped dessert mints or Chicklets®, as the lights and air conditioner, onto the foil wrapped gum RV body.
- Glue the rectangular candies onto the RV body for windows.
- Glue the foil wrapped round candies onto the RV body for the wheels.
- Display or eat!

